Mint Your CryptoBum Now for a 40% Fee Share on Marketplace Transactions!
XENBLOCKS, also called Xenium, is the Proof of Work blockchain created by Jack Levin, and it provides sybil resistance and data immutability to the hybrid model of PoS/PoW of the X1 chain. The possibility to mine XNM, XUNI; and superblocks with the CPU and GPU power of a home computer or rented GPU cards is a major advantage over ASIC mining, like in Bitcoin. Here we guide you on how to mine XENBLOCKS also called XENIUM.
What is XENBLOCKS
XENBLOCKS is a PoW blockchain that uses the Argon2ID hashing algorithm. It’s quantum resistant and memory-intensive, which means that it requires larger memory allocation to mine with GPUs or ASICS, making it more expensive as difficulty increases.
There are three kinds of tokens that can be mined all at once.
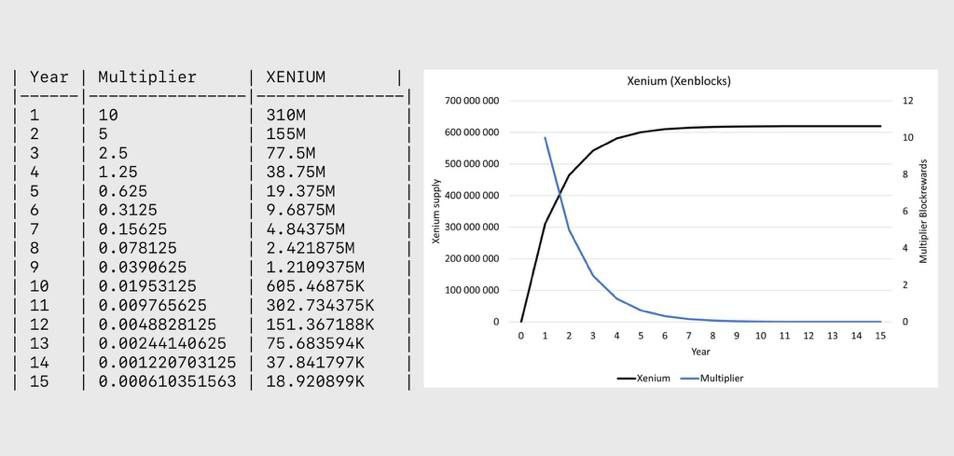
XNM (XENIUM) is awarded for each discovered block. The total supply of XNM is 620 mln and the first halving is after one year from the launch. There are 10 XNM per discovered block, and this reward is 5 XNM after the first halving, 2.5 XNM after another halving, and so on.
XUNI is mined during a 10-minute window, starting 5 minutes before the full hour and ending 5 minutes after. Their supply is unlimited.
Superblocks (X.BLK) are around 1000x harder to mine. Their supply is unlimited.
Miners will be able to stake their XNM tokens for XN rewards. Another possible use case of XNM is as a currency for payments for image rendering.
XNM supply
How to mine XENBLOCKS with GPU of your Computer
To mine XENBLOCKS on your computer, you need a NVIDIA GPU card installed. You also need a Linux-based distribution, like Ubuntu. If you have Windows, you can install Linux as a dual boot on your computer, or you can install a Windows Subsystem for Linux called WSL. Ask chatGPT how to do it. Once you have Linux installed, you can copy this line into your Ubuntu command line:
Mining with a CPU produces a very low hash rate, and fining a block is very difficult. However, it’s still possible to mine with a simple laptop. The mining speed depends on the number of miners deployed on a single computer.
It’s necessary to install Python by typing this into the command line of your Ubuntu:
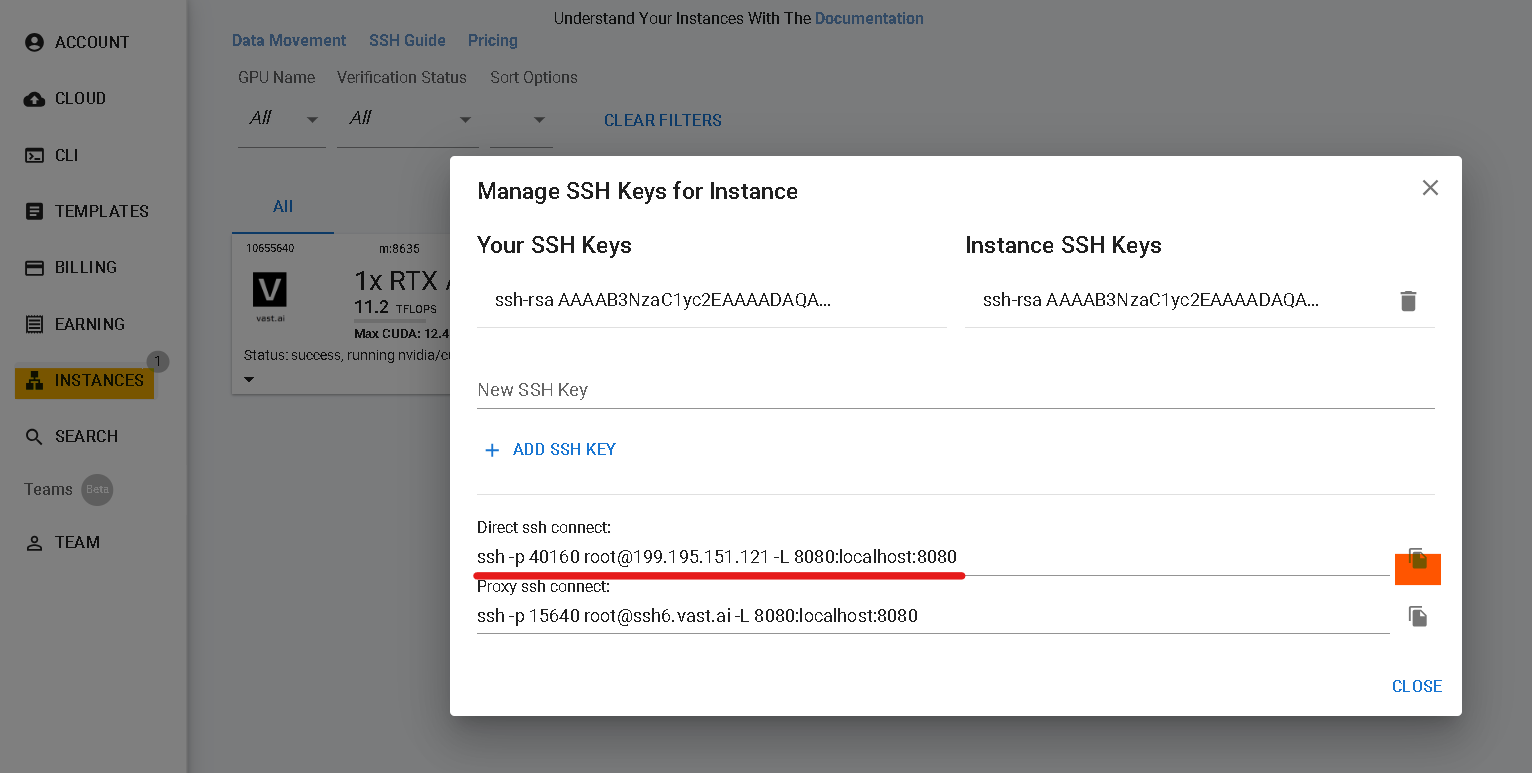
Vast.ai is a GPU marketplace where anyone can sell or buy GPU power. Register on vast through this referral link (vast.ai) and set the SSH key in your “Account” settings. To do that, you need to create SSH on your computer. Open the command line in Ubuntu and insert these instructions:
ssh-keygen -t rsa
Press the “Enter” key three times, then
cd .ssh/

cat id_rsa.pub
Copy the key to your vast account. It should start with ssh-rsa.
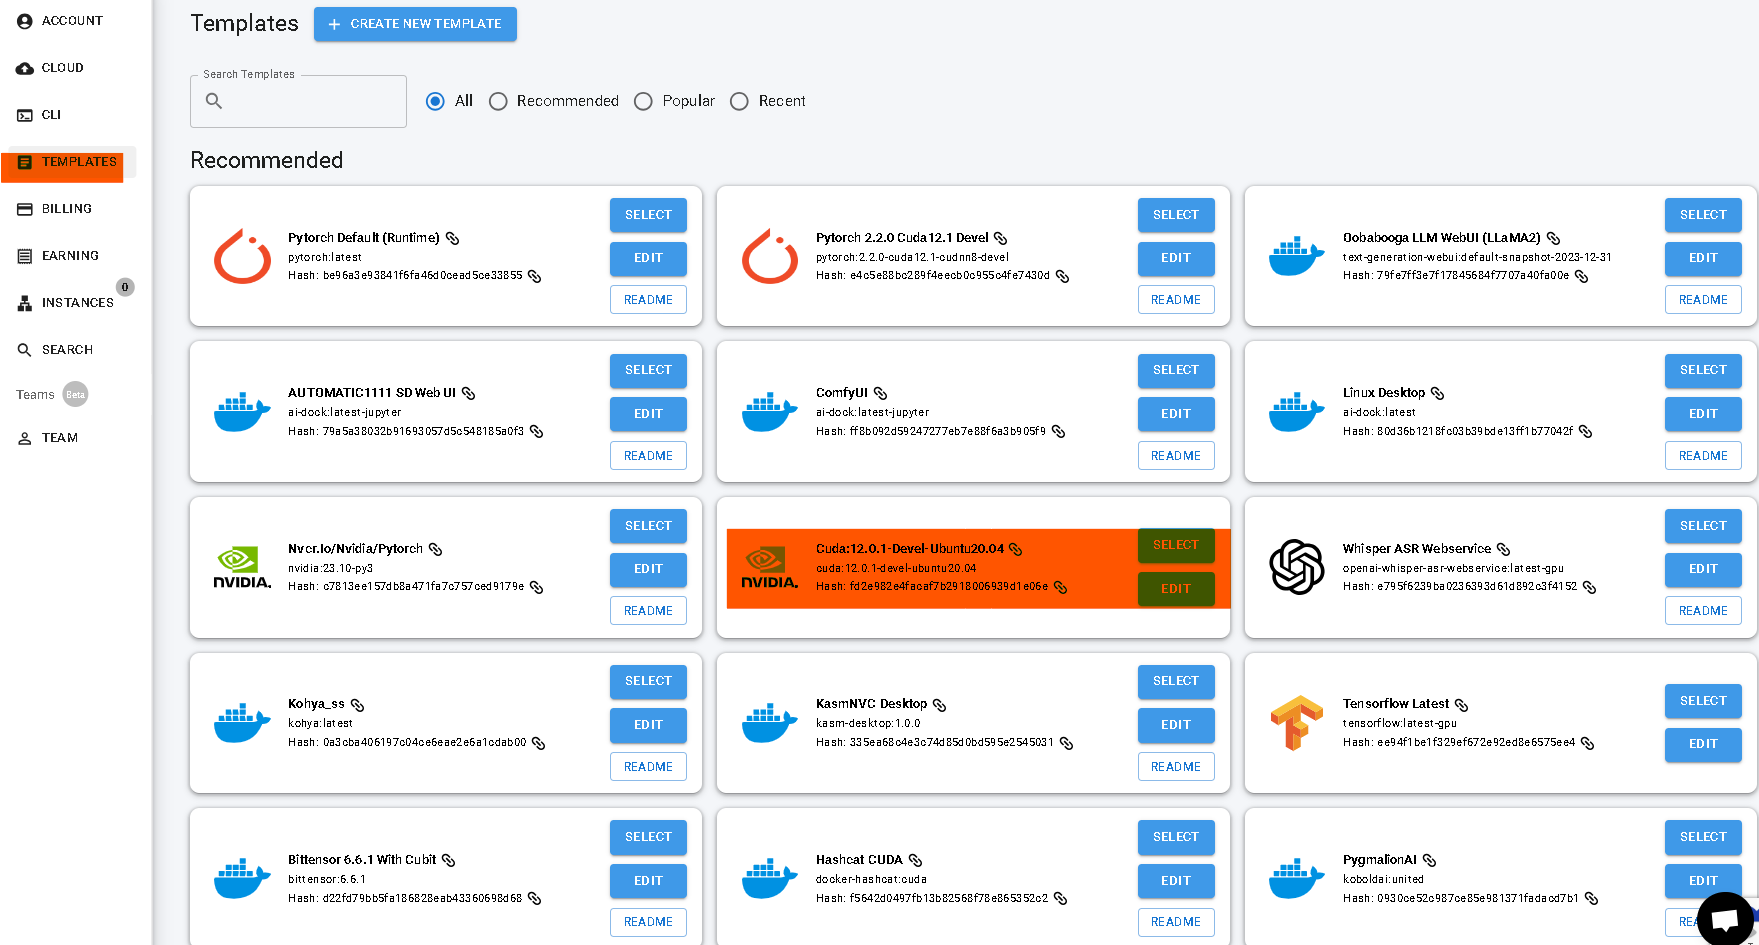
Once you’ve done this, go to “Templates” and choose Cuda:12.0.1-devel-ubuntu20.04.
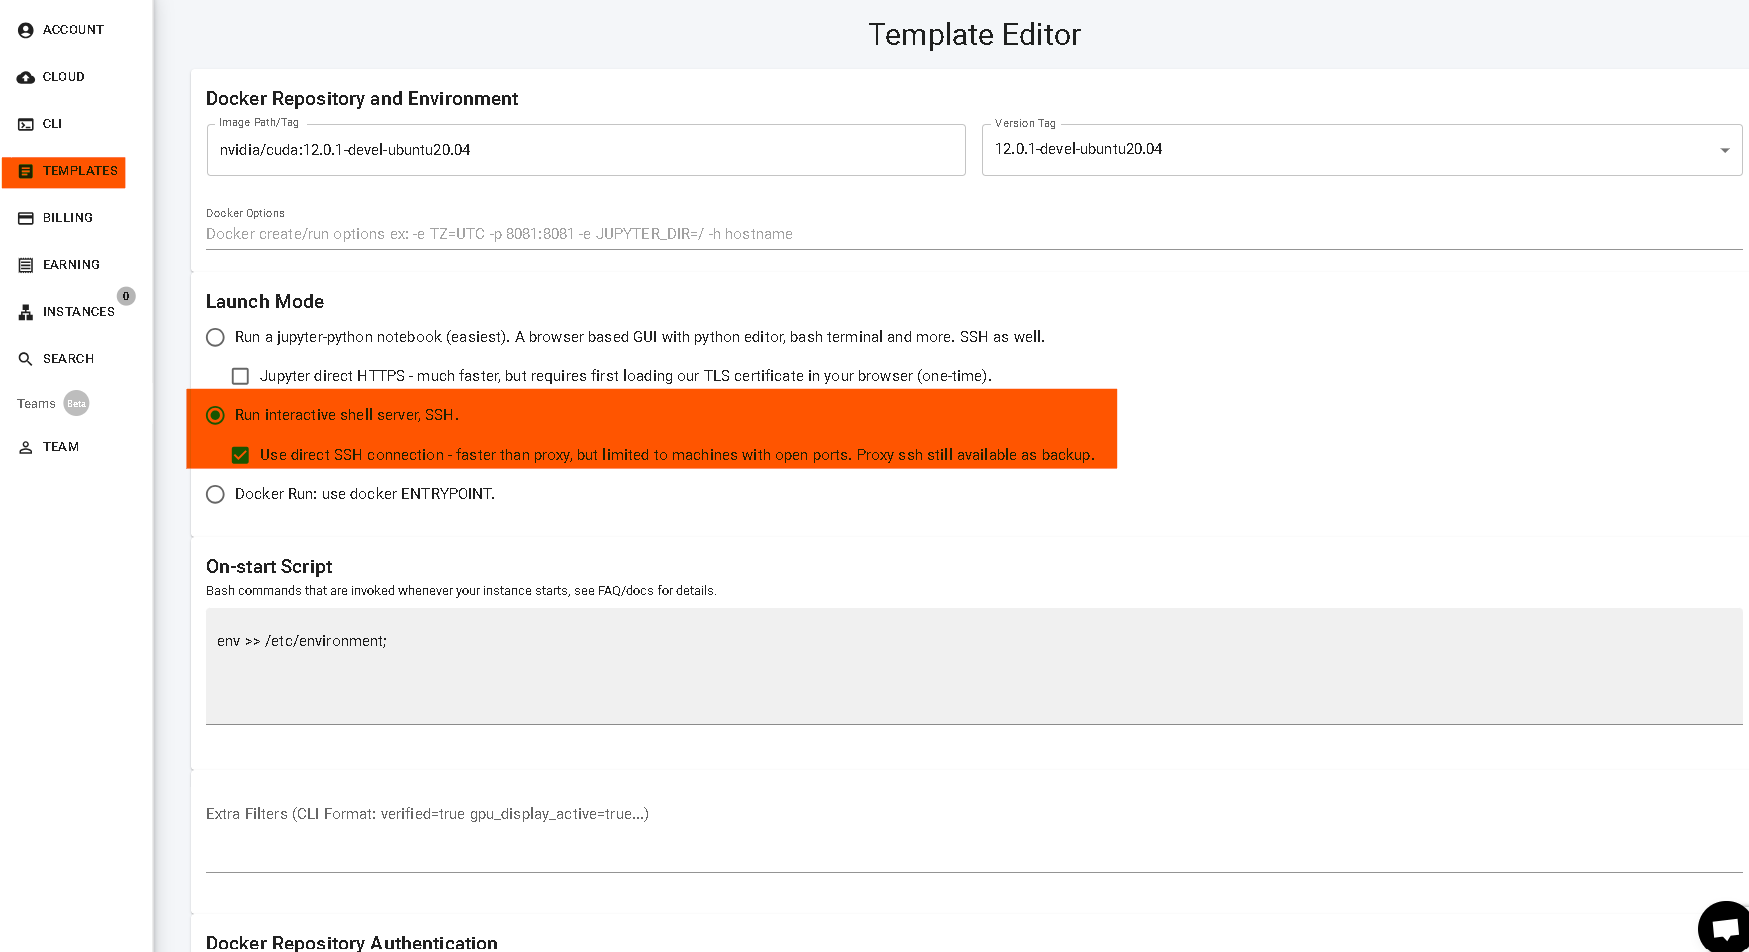
Edit the template to connect with SSH. You only need to create the SSH key and edit the template once.
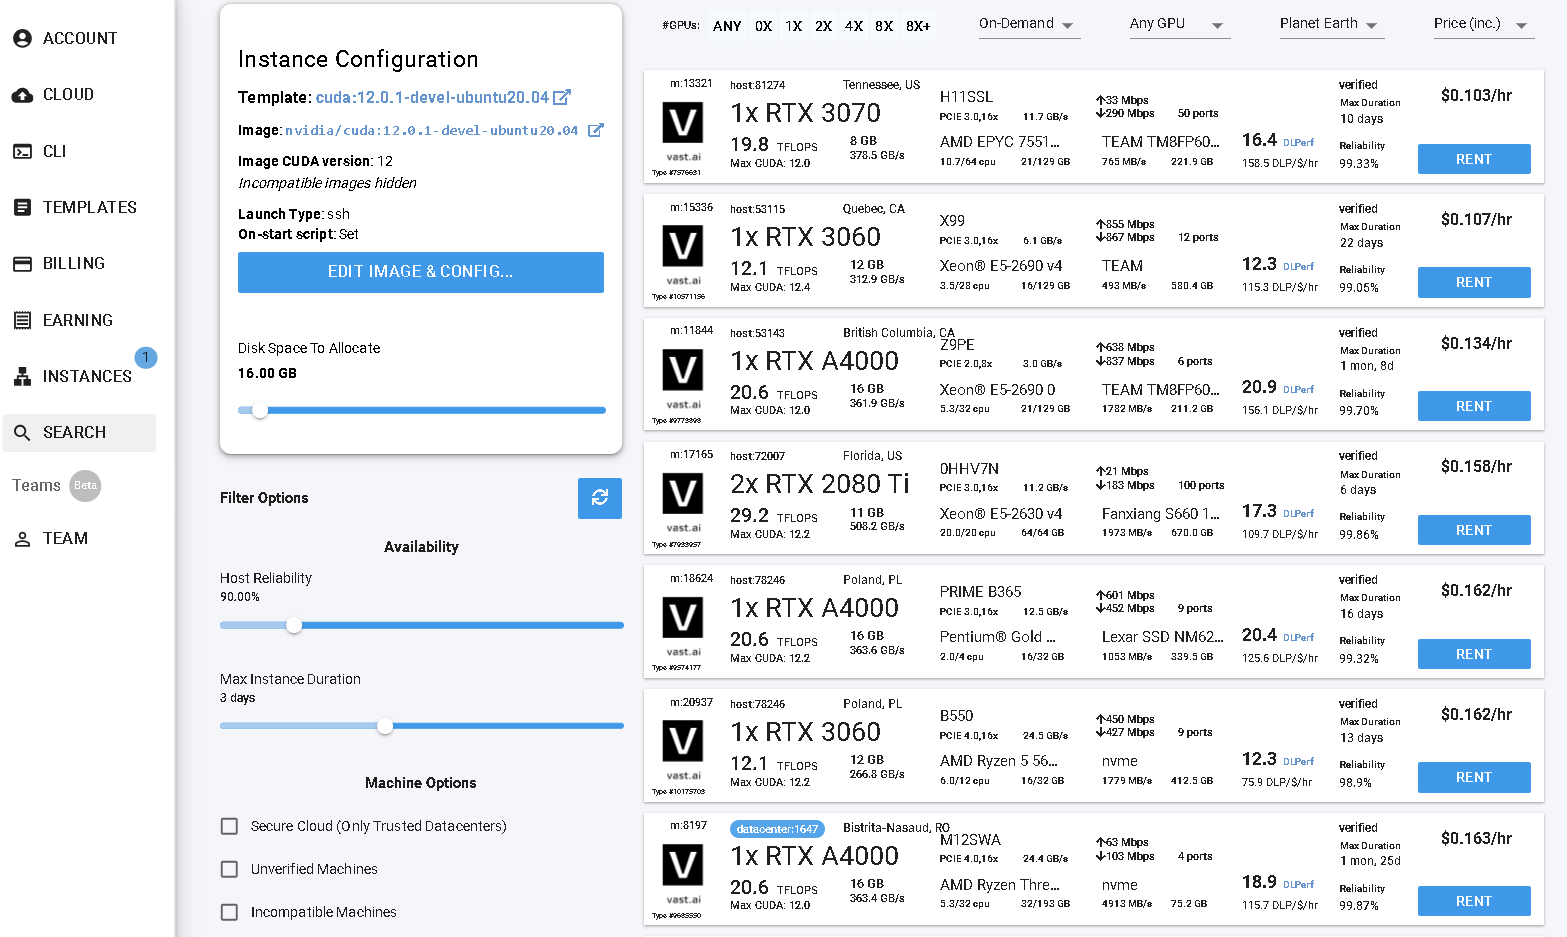
When you click “Select” you will find yourself on the main page with available GPU instances. They can be sorted by number of GPUs that vary from 1 to +8, they can be chosen by price and other variables. Selecting “Unverified Machines” will provide best price but will not give the guarantee that the instances will work. Once you rent your instances go to “Instances” section and wait for connection. Press the blue button “Connect” and copy the SSH of the instance. Paste it in your Ubuntu command line.
Instances for rent
SSH connection
Once you connected to the instance you need to install the miner by pasting this in your command line:
Next, insert your Ethereum address and set the fee.
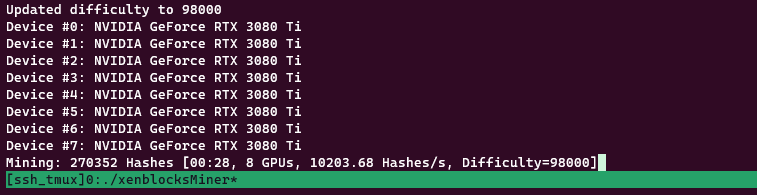
XENBLOCKS mining
You will see the blocks coming in after a while. The frequency of mined blocks will depend on the hash power of your GPU and the difficulty. Not every instance will work. You need to destroy instance every time you see it not mining otherwise you will be charged without having mined any Xenium.